
Overview
In this blog post we will be setting up a 2 node Elastic Search cluster on a Windows 10 or 11 machine using HyperV. We will be running two Ubuntu servers, installing ElasticSearch on both and creating a cluster.
Pre-requisites
- Enable virtualization in your BIOS.
- Enable Hyper-V on your Windows 10 Prof or Windows 11 Prof PC.
- Creating a network switch to allow static IPs for Hyper-V virtual machines.
Enable virtualization in the BIOS
The way this is done can different from one machine to another. Basically, look for any BIOS settings named 'Virtualization', 'Vt-d' or similar names and enable it. Unless enabled you will not be able to create virtual machines. Even WSL 2.0 (Windows Subsystem for Linux) requires virtualization to be turned on at the BIOS level.
Enable Hyper-V
Hyper-V is only available on professional edition of Windows 10 and Windows 11 operating system. To turn on Hyper-V type in 'Windows Features', you should get the 'Turn Windows features on or off' item, click it and select all Hyper-V features:

You may have to estart your PC after clicking OK. The next step is to add your user to the 'Hyper-V Administrators' group.
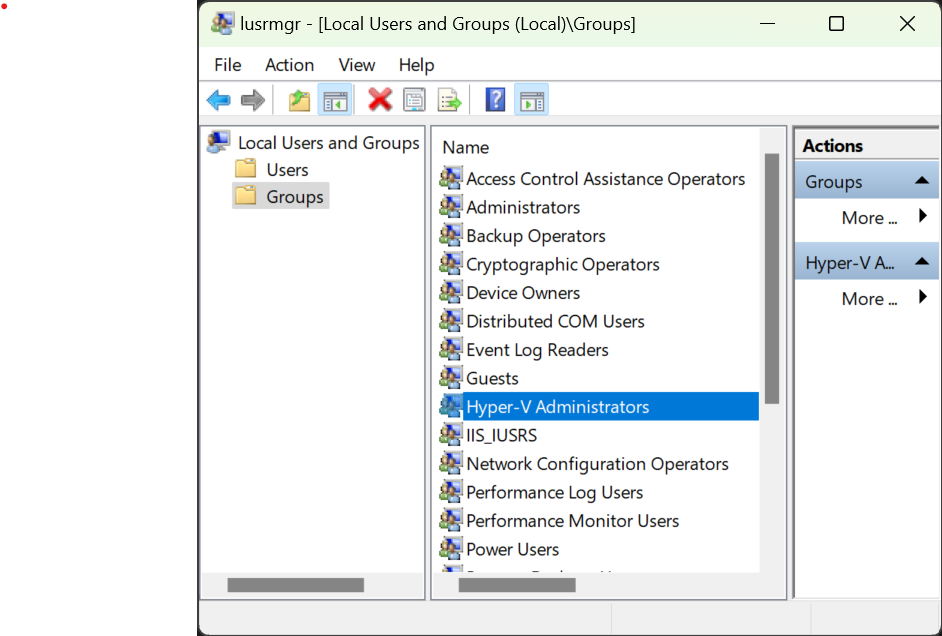
Search for 'Edit Local users and group' in the search app, select the 'Groups' item of the left and then double-click the 'Hyper-V Administrators', in the following dialog-box click the 'Add' button and enter the name of the current (your) user, click OK and then OK on 'Hyper-V Administrators Properties' dialog-box. You are now set to create the virtual machines.
Creating the network switch
The default network available in Hyper-V assigns a dynamic IP address to each virtual machine. This IP changes each time the virtual machine starts. For our purpose we would like to keep the IP address fixed. To use static IPs we create a network swtich which is then used by the virtual machines.
First, we need to make a list of the DNS servers on the PC, run the following command
ipconfig /all
Look for entries against 'DNS Servers', note them down somewhere, we will need these later.
Open a Administrative Powershell Window.
Execute:
New-VMSwitch -SwitchName "StaticSwitch" -SwitchType Internal
Next run:
Get-NetAdapter
You'll see a list of network adapters present on the machine. You should see the new switch created in the previous step, now down the number mentioned in the ifIndex column:

Next run:
New-NetIPAddress -IPAddress 192.168.98.1 -PrefixLength 24 -InterfaceIndex <IFINDEX>
New-NetNat -Name MyNATnetwork -InternalIPInterfaceAddressPrefix 192.168.98.0/24
Replace <IFINDEX> with the ifIndex noted in the previous step. 192.168.98.0 will be the gateway IP address which will be used by the virtual machines.
Preparing the virtual machines
Download a copy of the Ubuntu Linux ISO, as of this time, it is available at https://ubuntu.com/download/server. You could even opt to use Ubuntu Desktop, in this post, Ubuntu Server is used. Note: Ubuntu Server does not come with a desktop GUI, you are limited to using the command line (Terminal) only.
Create the VM
Launch the Hyper-V Manager application. Click the 'New -> Virtual Machine' item from the Actions pane.

Enter the relevant details at each step as shown below. Ensure you select the 'Default Switch' and not the one created manually earlier. Ensure you select the correct amount of RAM and select the Ubuntu ISO file in the last step. Once all wizard steps are completed the virtual machine is ready to be started.
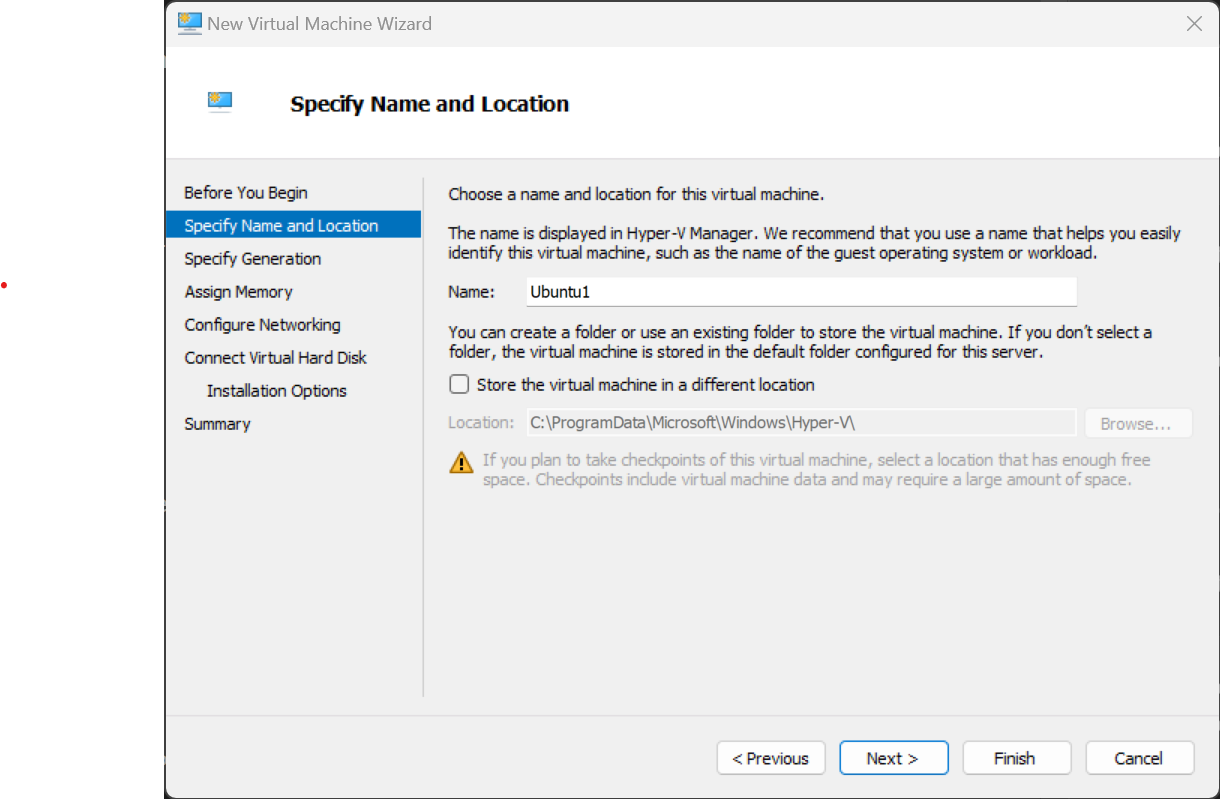
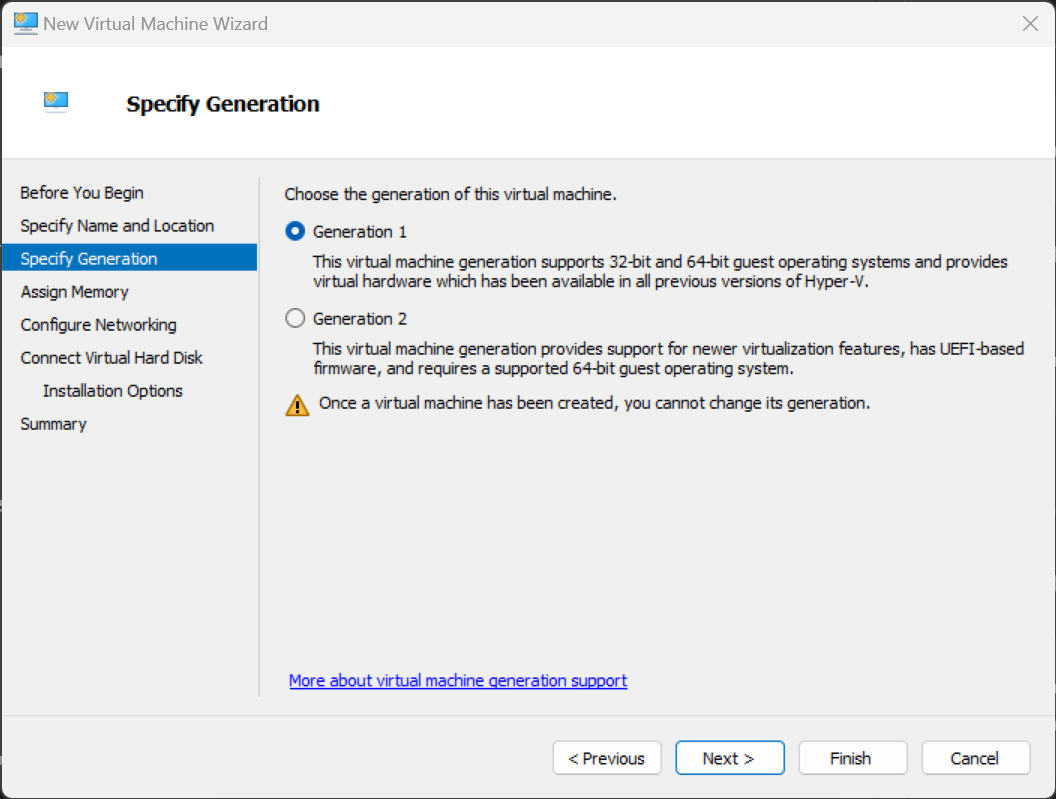
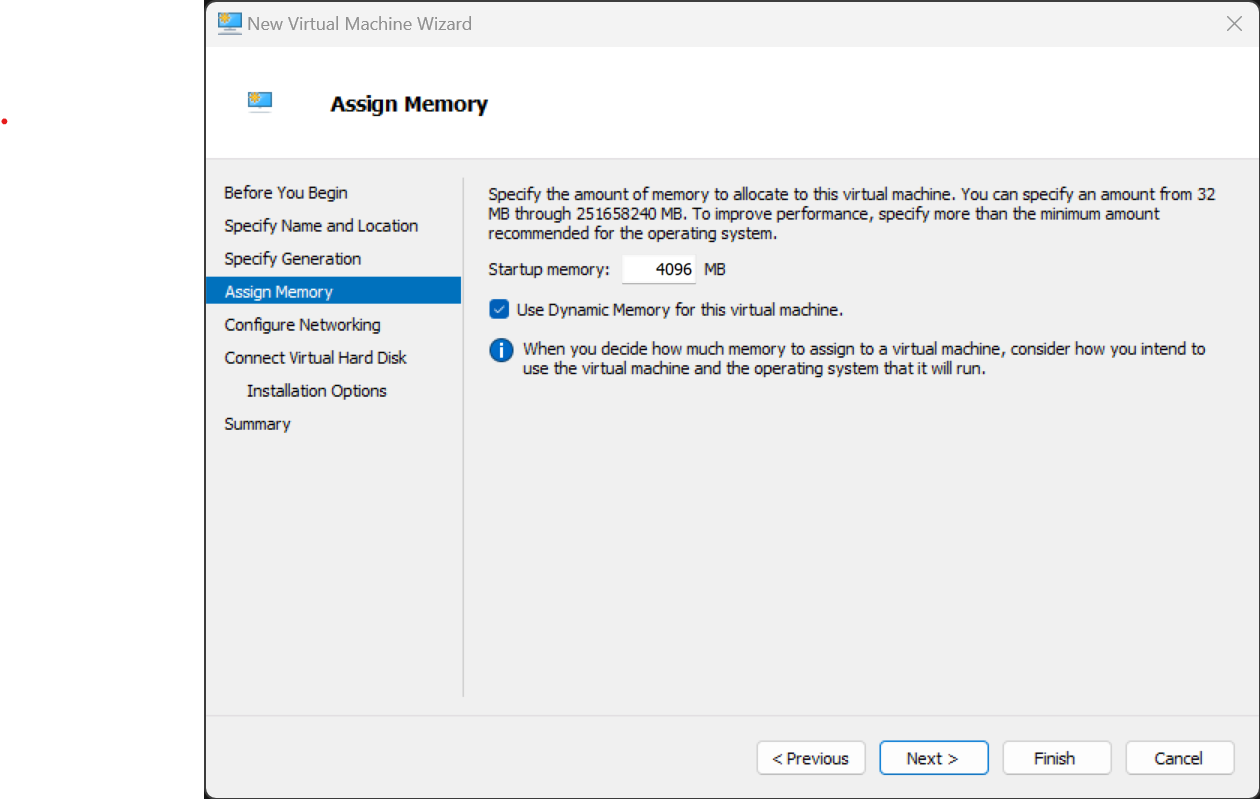
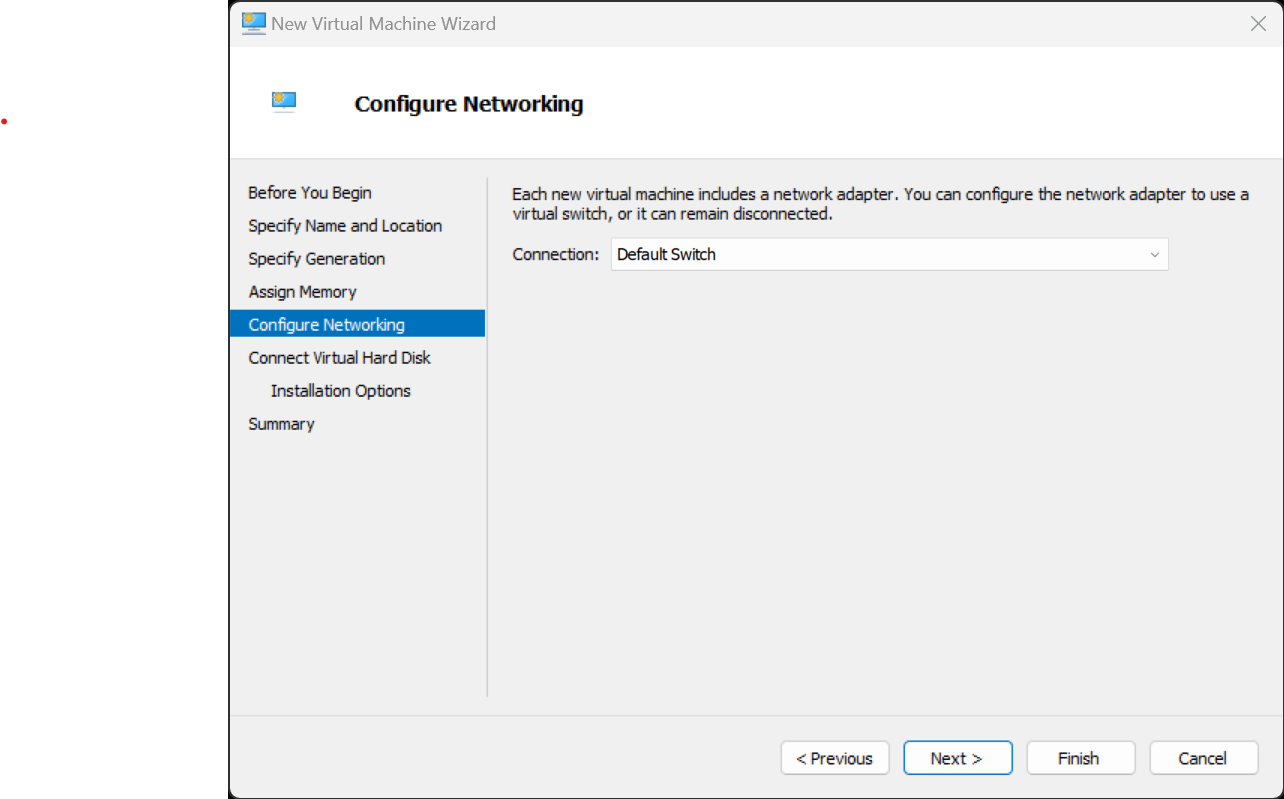
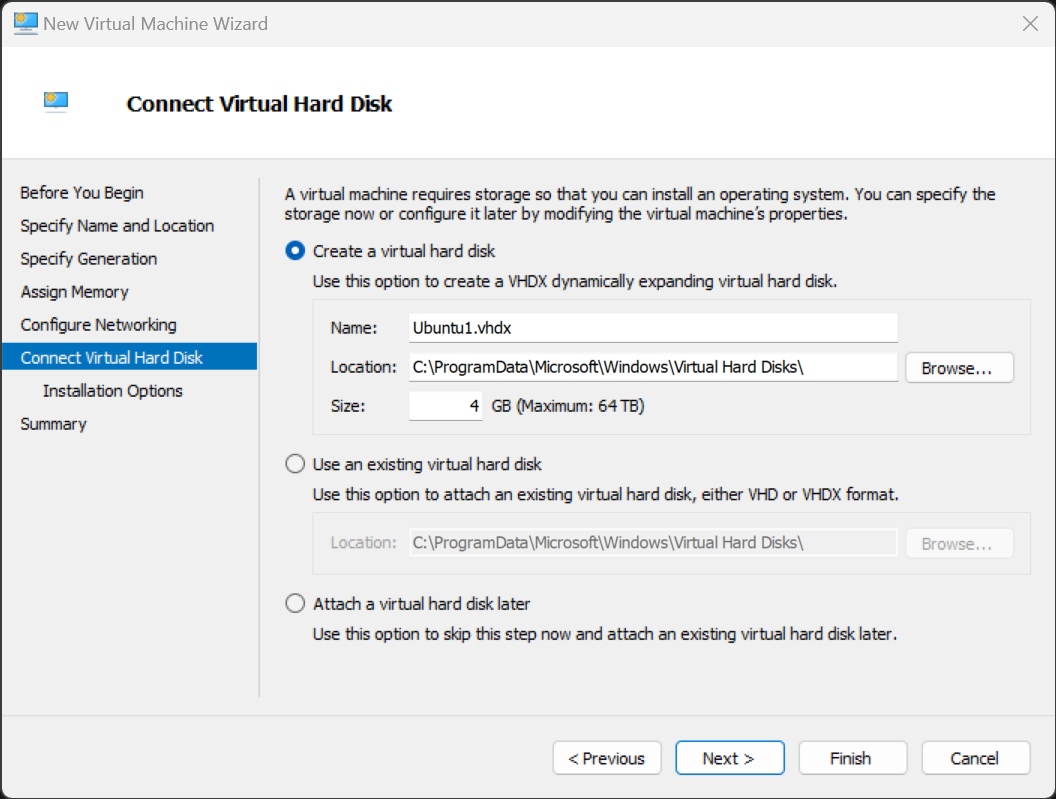
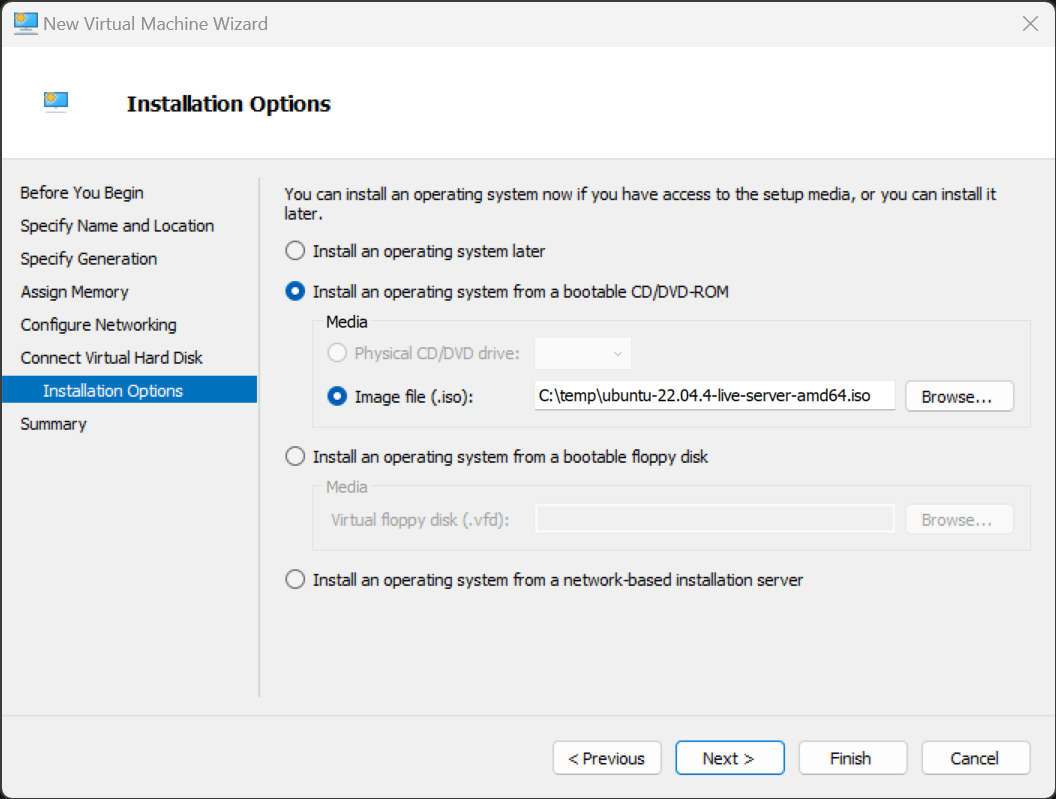
Double click the VM from the list in the Hyper-V Manager app, click the Start button. Go through the screens displayed by the Ubuntu installer, ensure you opt to installed 'Open SSH Server'. Once Ubuntu installed we need to configure the network to use static IPs instead of dynamic IPs.
Once VM installed, it is assigned a dynamic IP by Hyper-V. Before we change to using static IP, we need to execute the following commands in the Linux terminal:
sudo apt-get update
sudo apg-get upgrade
sudo apt-get install openvswitch-switch-dpdk
sudo apt-get install network-manager
We are not ready to configure the static IP. The configuration is specified in a file named as '00-XX--' present in the /etc/netplan/ directory.
Make a copy of this file in your home directory in case you want to revert any change. Next, Use your favorite editor to edit this file (as root). The new content should look like:
# This is the network config written by 'subiquity'
network:
  ethernets:
    eth0:
      dhcp4: false
      addresses: [192.168.98.10/16]
      routes:
      - to: 0.0.0.0/0
        via: 192.168.98.1
      nameservers:
        addresses: [8.8.8.8,1.1.1.1]
  version: 2
We are setting 192.168.98.10 as the static IP of this VM. The 'via: 192.168.98.1' specifies the gateway which is the switch we created earlier, the addresses under nameservers is the list of DNS servers we noted earlier. Save the file.
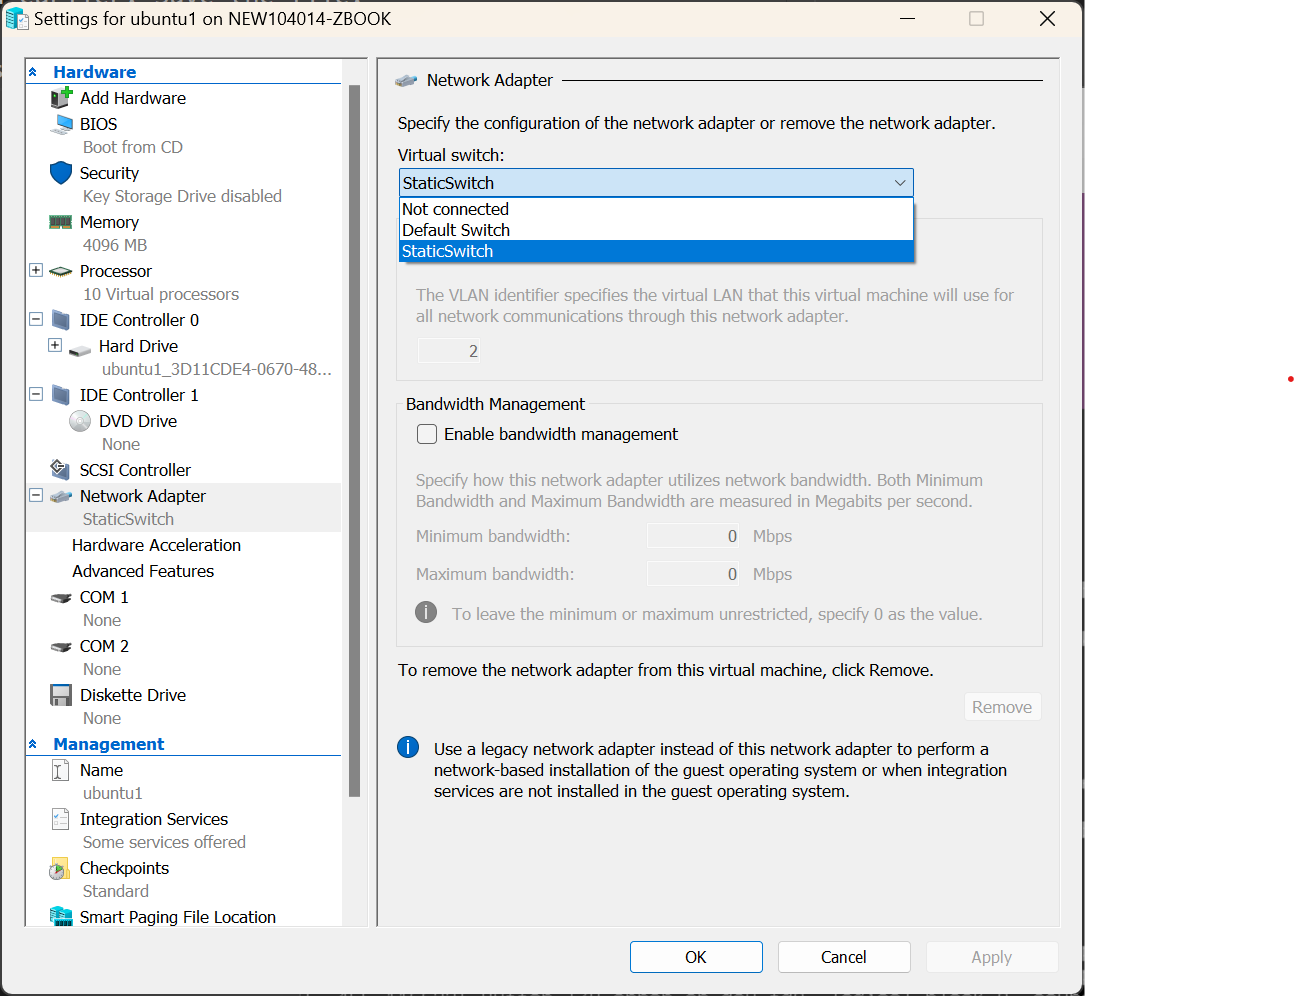
Head back to the Hyper-V Manager application, select the runnig VM window, select File -> Settings, locate the 'Network Adapter' item on the left and select the 'StaticSwitch'. Click OK.
Now back to the Linux terminal, run:
sudo netplan apply
Your VM should now be configured to use the static IP. You can try by running:
ping google.com
ip address
You should see 192.168.98.10 as your IP address.
Repeat the same steps to create another VM with a different IP address (192.168.98.10).
Confiugreing Elastic Search
We will be configuring the following software:
- The first Elastic Search node on the first Linux VM.
- Kibana on Windows.
- The second Elastic Search node on the second Linux VM.
Installing the first Elastic node
You can now SSH into the Ubuntu from Windows VM by running:
ssh yourusername@192.168.98.10
or you can use a software like MobaXTerm for doing SSH. Once in Linux exeucte the following commands:
wget https://artifacts.elastic.co/downloads/elasticsearch/elasticsearch-8.13.1-linux-x86_64.tar.gz
tar -xvzf elasticsearch-8.13.1-linux-x86_64.tar.gz
sudo mkdir /usr/share/elasticsearch
sudo mv elasticsearch-8.13.1 /usr/share/elasticsearch/
/usr/share/elasticsearch/bin/elasticsearch
ElasticSearch should start running. At the end of the start up process, you'll see the autogenerated password for the 'elastic' admin user, information on how to connect Kibana and how to join new nodes to the cluster. Copy this output and store it for later use.
Installing Kibana
We are dedicating both Linux VMs for running Elastic Search, so, we'll install Kibana on the host Windows machine itself. Kibana was downloaded from here https://artifacts.elastic.co/downloads/kibana/kibana-8.12.2-windows-x86_64.zip for this blog post.
Installing Kibana is simple, unzip the files to a directory, run the kibana.bat in the bin folder. Kibana can take a couple of minutes to load, once ready the Kibana console output will show a message like "Kibana is now available". Kibana can be accessed at http://localhost:5601/ using a web browser.
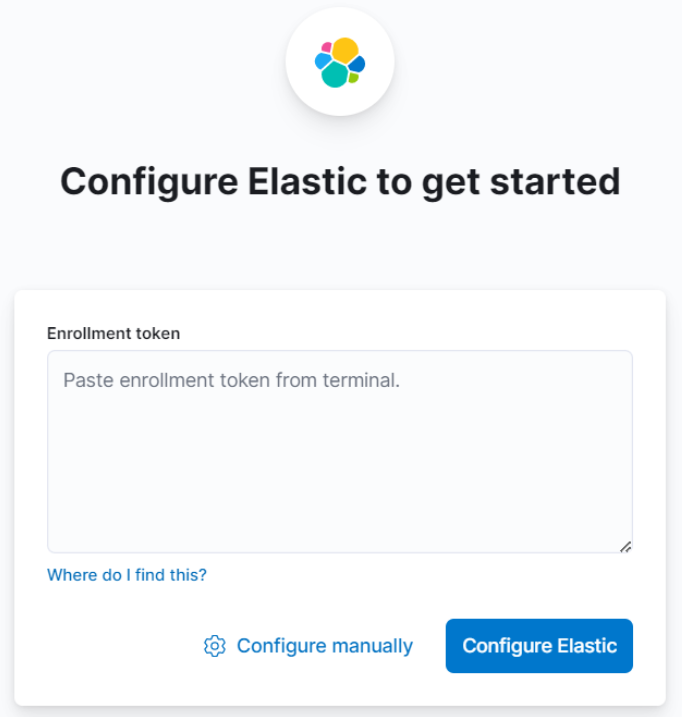
The first thing we need to do is connect Kibana to our instance of Elastic Search. Copy the Kibana enrollment token provided by Elastic Search when it first started, note, this value is valid for a short time. Copy and paste this value in the textbox presented by Kibana and you should be set to go.
Installing the second Elastic Search node
We need to configure a couple of settings in the first Elastic Search node before installing second Elastic Search node. Stop the running instance of Elastic Search, edit the file /usr/share/elasticsearch/elasticsearch-8.13.1/config/elasticsearch.yml.
Uncomment these lines and specify the proper value:
cluster.name: MyElasticCluster
node.name: node1
network.host: 192.168.0.1
http.port: 9200
transport.host: 0.0.0.0
The cluster name is especially important to allow the 2nd Elastic Search node to join the cluster.
Restart Elastic Search. Run the following command:
cd /usr/share/elasticsearch/elasticsearch-8.13.1
bin/elasticsearch-create-enrollment-token -s node
This command will generate a token which will allow the second Elastic Search node to join the cluster.
On the second Ubuntu VM:
Install Elastic Search on the second Ubuntu VM. Just unzip the ElasticSearch tar.gz, do not run the elasticsearch shell script.
Edit the file /usr/share/elasticsearch/elasticsearch-8.13.1/config/elasticsearch.yml. Set the values for the following:
cluster.name: MyElasticCluster
node.name: node2
http.port: 9200
transport.host: 0.0.0.0
Save the file.
Next, run the following command:
cd /usr/share/elasticsearch/elasticsearch-8.13.1/bin
bin/elasticsearch --enrollment-token <token>
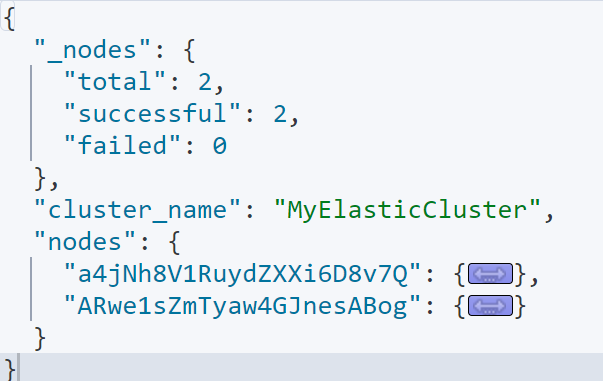
Replace <token> with the enrollment token created by running the 'elasticsearch-create-enrollment-token' on the first node. The second node should now become part of the cluster. You should be able to check this by running the following query in Kibana:
GET /_nodes
Which will output a result like:
Hope you find this post useful!
